Now that the Simple Stories Elementary Blog Hop is over, it is time to post the directions to make my report card holder as promised. For those of you who didn't participate, I had sneek peeks of the report card holder on my blog yesterday. There were a lot of participants yesterday and I want to thank them again for taking part in it and leaving nice comments. This has a lot of steps to it, sorry for it being long, but the end result is awesome. Now for the cover, instead of piecing it together like I did, you could use cardboard from a box. Just break it down to a long piece, cut the whole cover from it in one big piece, and scole and fold like the directions. Of course I thought of this after I made mine. Duh! Why didn't I do that.;) This project was made from the Simple Stories Elementary collection. So without further ado, let's take a flashback to the 70's and 80's (yes that is me in the photos)...............
Report Card Holder
MW Products Used:
--Simple Stories: Elementary—Kit, Designer Cardstock Pack, American Crafts Cardstock Pack, Ribbon Bundle, Free Downloadable Circle Punches and Word Strips
--Doodlebug: Buttons—Tangerine
--American Crafts: Cardstock—Vanilla
--Distress ink: Fired Brick, Barn Door, Peeled Paint, Crushed Olive, Bundled Sage, Faded Jeans, Tea Dye, Scattered Straw, Spiced Marmalade, Wild Honey
--Distress Crackle Paint: Tea Dye
--Ranger: Ink Blending Tool and Foam
--Maya Road: Decorative Kraft Envelopes
Non-MW Products Used:
--Distress Ink: Tumbled Glass, Broken China, Antique Linen, Walnut Stain, Mustard Seed
--Chipboard or Cardboard
--Strong Adhesive (wet and/or dry)
--Velcro
*Make sure this is big enough to fit report cards. Allow ½” from each edge of report card to create panels.
Step 1: Gather supplies.
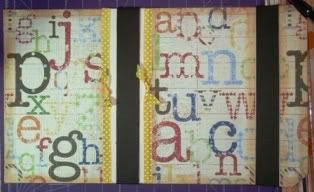
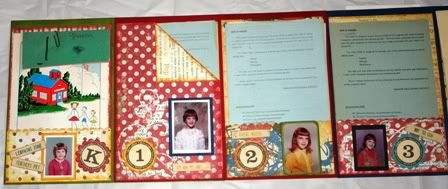
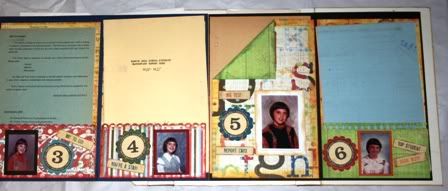
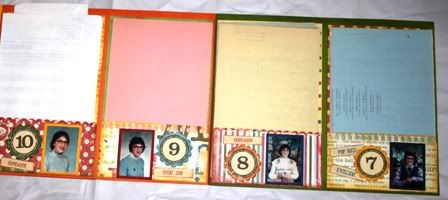
Step 2: Set aside a sheet of the cardstock of choice for the cover. (I used Vanilla. You will need 2 sheets of it to make the cover.) Cut 6 colored cardstock into 9 ½” X 12” strips. Score and fold strips in half. These are the panels of the accordion. Ink edges of cardstock. Stack folded cardstock so that the fold and open edge alternate and adhere the panels together to create the accordion. Set aside.

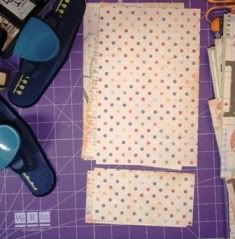
Step 3: Set aside a sheet of the designer cardstock of choice for cover. (You will need 2 sheets for the cover.) This will be cut later. For the pockets, cut 10 pieces of the designer cardstock into 5 ¾” X 12” strips and cut 3 into 5 ¾” X 9” pieces.
Step 4: For pockets on 6 of the strips of cardstock, score and fold 3” from one end. For the other 4 strips, measure and cut designer cardstock at 3”. Keep these pieces together because they are adhered together in step 6. (If you want, you don’t have to cut 4 of the cardstock strips. Instead you can score and fold the same way as the other 6 strips.)
Step 5: (optional) Use border punches of choice along 5 ¾” pocket edge of the strips. Use ink blending tool, ink edges of all pieces.
Step 6: Adhere edges of the 10 strips of cardstock using 1/8” double tacky adhesive. Be sure to line strip of adhesive/tape along the edge of the paper. (For 6 folded strips, apply adhesive to 1 or both side edges of pocket. For 4 cut strips, apply adhesive to back of 3” X 9” piece along 1 or 2 side edges and bottom edge and adhere to one end of the other half of the cut strip.)
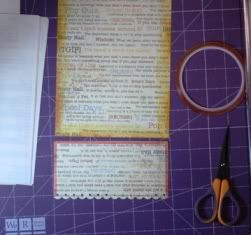

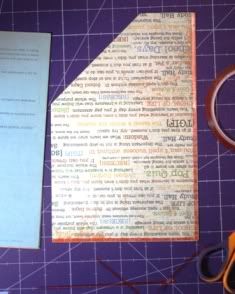
Step 7: Fold one of the top corners over on the 3 sheets of 5 ¾” X 9” pieces. Ink the edges of the folded corner and adhere to front of the designer cardstock. Apply 1/8” double tacky adhesive strips to the back long edge and bottom edge.
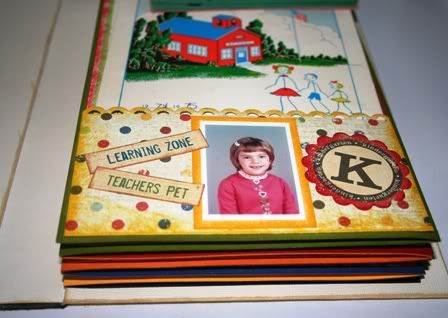
Step 8: Adhere all of the pockets in order on the cardstock panels of the accordion. *Note: the last panel after 6th grade is left blank. This panel is used to adhere the accordion to the inside of the cover. Embellish the front of the pockets. Set accordion aside.
To make the cover:
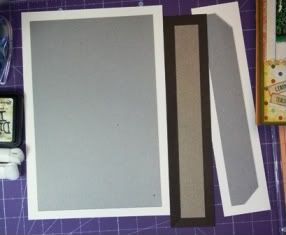
Step 1: Cut 2 sheets of chipboard as follows: 2 – 6 ½” X 10” (front and back covers), 2 – 1 ¼” X 10” (bindings), and 1 – 1 ½” X 10” (flap). Cut 2 sheets of vanilla cardstock into 2 - 7 ½” X 11 for the cover and cutting from the remaining strips of vanilla cardstock, cut 1 into 2 ½” X 11” piece for the flap and cut 2 into 2 ½” X 10” pieces for the inside of the binding. Cut from coffee cardstock, 2 pieces 2 ½” X 11” for the binding. Cut from designer cardstock of choice, 2 – 6 ½” X 10” and 1 – 1 ½” X 10” pieces.
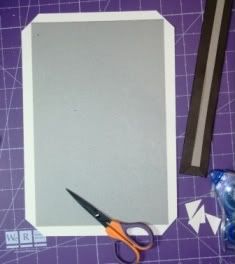
Step 2: Adhere chipboard pieces to the center of the cardstock pieces (except for the 2 vanilla inside binding pieces).
Step 3: Cut corners diagonally across close to the corner of the chipboard. This will create a mitered corner.
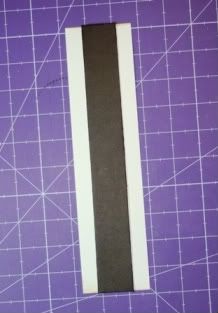
Step 4: Fold over the cardstock to the bare side of the chipboard and adhere the cardstock to the chipboard. Once the bindings are created, adhere back side of bindings to the center of the 2 – 2 ½” X 10” pieces of vanilla cardstock.
Step 5: Adhere vanilla binding strips to the bare side of chipboard covers and flap. (Bindings attach covers and flaps together). Assemble order: cover, binding, cover, binding, flap.
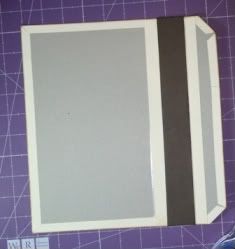
Step 6: Adhere designer cardstock pieces to the bare side of the chipboard pieces of the covers and flap.
Outside cover:
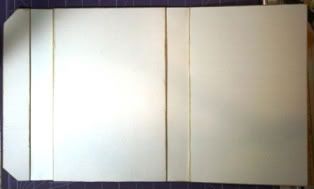
Inside cover:
Step 7: Adhere the last blank panel of accordion to inside back cover.
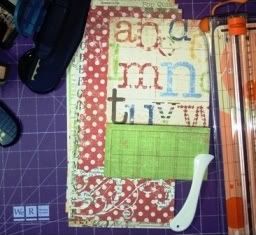
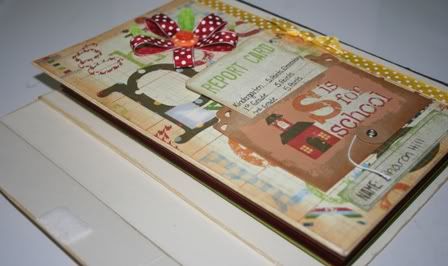
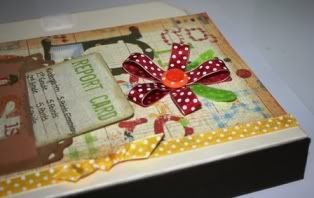
Step 8: Adhere Velcro to inside of flap and on outside of front cover. Embellish front cover.
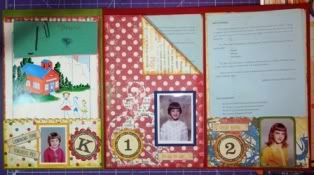
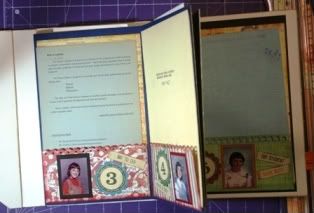
Completed Report Card Holder Opened:

Accordion folded in cover:
Back Cover:

There you have it, a completed report card holder. You could also use it to store certificates and awards or drawings that your kids made. Wouldn't this make a cute recipe holder as well? The possibilities are endless.............
Happy Scrappin'!