
Happy 4th of July everyone!!! I hope all is well and everyone is safe. Don't like to hear of fireworks accidents. I'll be joining my parents later for supper/cookout. I hope everyone is having fun with the blog hop. After this blog hop, I want to keep up with this blog and to add more things to it (once I figure out how to do it) like I see on other blogs. I also want to do more project posts with supply list and/or instructions to make it yourself. Now as promised in yesterday's post, I am now going to post my distressed tags that I made. So if you missed seeing it on the MemoryWorks Blog a few months ago, here it is now.
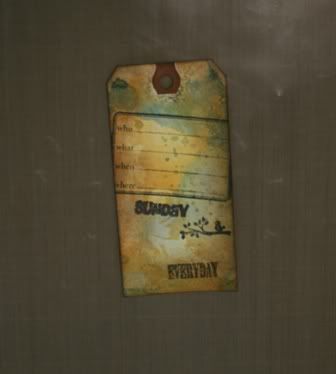
DAYS OF THE WEEK TAGS by Sharon Hill
Techniques Used: Distressing, Wrinkle-Free Distressing, Masking, Stamping, Heat Embossing.
MW Products Used:
Tim Holtz Distress Ink in Spiced Marmalade, Faded Jeans, Scattered Straw, Vintage Photo, Black Soot.
Tim Holtz Embossing Ink
Tim Holtz Distressing Powder in Black Soot
Tim Holtz Florets Mini Mask
Ranger Non-Stick Craft Mat
Ranger Ink Blending Tool and Blending Foam
Ranger Mini Misters
7 Gypsies Journal Clear Stamps
American Crafts Fun Clear Stamps
Non-MW Products Used:
Shipping Tags from Staples
Heat Gun
Clear Blocks
Stamp Scrubber
Tray
Water
Paper Towels
Step 1:
Gather supplies.

Step 2:
- Swipe ink of choice next to each other on craft mat.
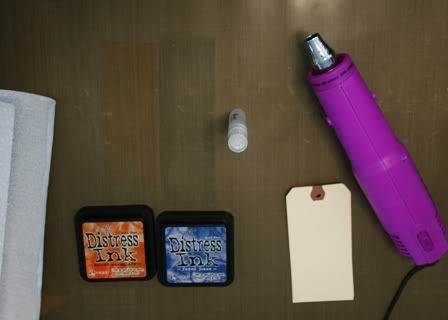
- Spritz ink with mini mister.
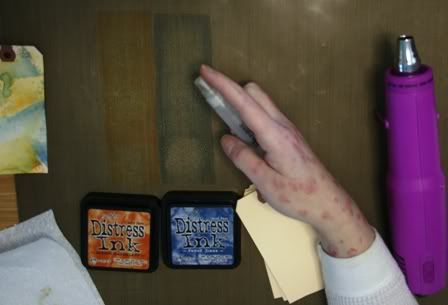
- Place tag onto ink.
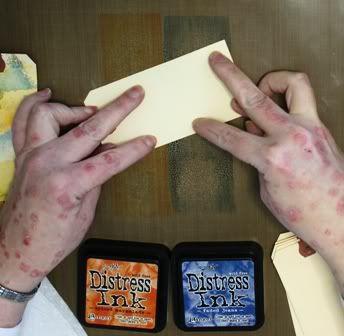
- Carefully lift tag and dry with heat gun. (*Note: Tag will curl when wet but will flatten when dry)
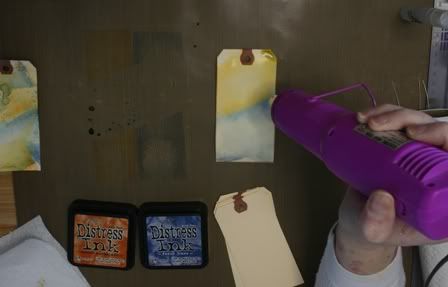
- Place tag on remaining ink and dry again. (*Note: Try to avoid placing tag on large droplets. I used paper towel corner to wipe them up.)
- Wipe leftover ink from mat.
Step 3:
- Using ink blending tool, ink edges of tag with a circular motion.

Step 4:
- Place mini mask on tag.
- Using ink blending tool, apply ink over mask using a swirling and blotting motion.
- Peel mask off tag.

Step 5:
- Stamp image of choice.

Step 6:
- Stamp with embossing ink.
- Shake Distress Embossing Powder before opening to mix powder and crystals.
- Sprinkle powder over stamped image and tap excess powder off of tag.
- Heat with heat gun. (*Note: Distress Embossing Powders take longer to set than regular powder. Image will be matte and feel rough like sandpaper. If it feels like sand, heat image again.)
- Once tag and image are cool, rub finger over embossed area to remove the crystals. This gives a more distressed look. Throw away what is rubbed off.

Finished Tags:
- Once I finished embossing, I stamped the bird on the branch image.
- Decorate as desired.
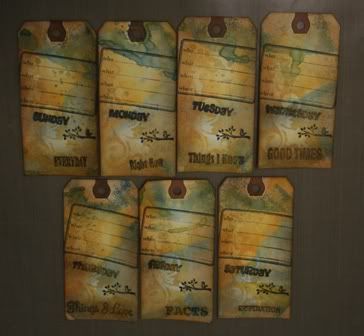
These tags could be used with your Simple Stories album as journaling for the page.
So there you have it. I totally love Tim Holtz's products and techniques. I love the Wrinkle-Free Distress Technique at the beginning with the ink and water. You can use different color combinations depending on what you are using the technique on (for ex, red and green ink for christmas). Once I play around some more with new techniques, I'll share them here with you as well.
Enjoy the rest of your holiday today and stay safe!! After all, you'll need all your fingers in order to scrap all the pics you take today and fireworks pics you take tonight.;)
I'll announce the winner of the blog hop tomorrow.
Happy 4th!
very cool post Sharon!
ReplyDeletei'm all over Distress Inks too!!
love 'em!
wendy :)
aka ScrapNspire
http://scrapnspire.blogspot.com/
great tutorial!
ReplyDelete